gPRC入门指南
目录
1,gRPC 简介
RPC 是指远程过程调用,允许一台计算机上的程序调用另一台计算机上的程序,就像对本地函数进行调用一样方便。
gRPC 是由 google 开源的一个高性能、通用的 RPC 框架,基于 HTTP/2 协议标准,同时支持大多数流行的编程语言。
gRPC 官方地址:
2,protobuf 简介
gRPC 默认使用 protobuf 协议进行数据序列化,protobuf 是 Google 开源的一套数据结构,适合高性能的数据传输场景;
protobuf 与 JSON,XML 相比,具有以下优点:
- 在定义上,更加简单明了,并且减少了二义性。
- 数据量更小:是另外两者的 1/10 到 1/3。
- 速度更快:序列化、反序列化的速度更快。
- 生成了更易使用的数据访问类。
protobuf 数据类型与 golang 的对应关系如下:
| .proto Type | go Type | .proto Type | go Type |
|---|---|---|---|
| double | float64 | fixed32 | uint32 |
| float | float32 | fixed64 | uint64 |
| int32 | int32 | sfixed32 | int32 |
| int64 | int64 | sfixed64 | int64 |
| uint32 | uint32 | bool | bool |
| uint64 | uint64 | string | string |
| sint32 | int32 | bytes | []byte |
| sint64 | int64 |
gPRC 调用模型如下:
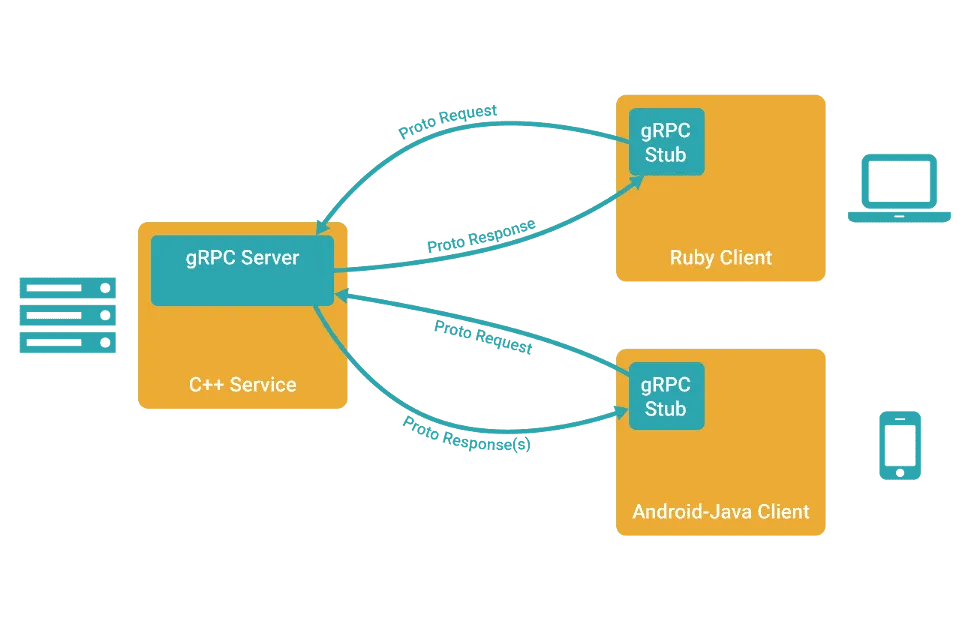
- 客户端在程序中调用某方法,发起 RPC 调用。请求信息使用 Protobuf 进行对象序列化。
- 服务端接收请求后,对请求进行解码,并进行业务处理后返回。响应信息使用 Protobuf 进行对象序列化。
- 客户端接收到服务端的响应后,对响应信息进行解码,并将解码后的信息返回给调用者。
3,protoc 安装
protoc 是 protobuf 的编译器,用来编译 .proto 文件(转化成对应语言的代码文件),其下载地址是 https://github.com/protocolbuffers/protobuf/releases 。
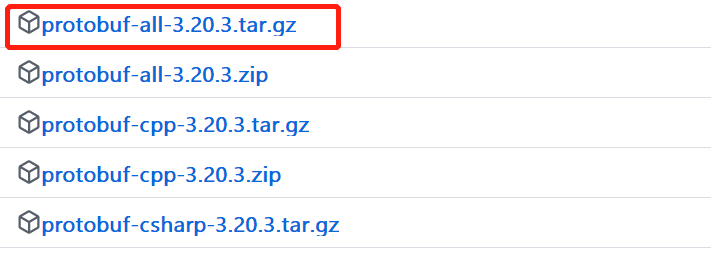
注:我这里使用的是 Linux 系统,下载的是 proto3 版本。
下载到 protobuf-all-3.20.3.tar.gz 包后,使用下面命令进行解压,编译,安装:
> tar -xzf protobuf-all-3.20.3.tar.gz	# 解压
> cd ./protobuf-3.20.3
> ./configure
> make									# 编译,此过程可能会比较慢
> make install							# 安装,需要 root 权限
> ldconfig								# 系统重新加载动态链接库,需要 root 权限
检查是否安装成功:
> protoc --version
————————————————————
libprotoc 3.20.3
4,protoc-gen-go 安装
针对不同的语言,还需要安装运行时的 protoc 插件,Go 语言对应的是 protoc-gen-go,当使用 protoc 时,会自动调用 protoc-gen-go。
安装方法如下:
# 需要在 go 项目目录中执行
> go get github.com/golang/protobuf/protoc-gen-go
5,使用 protobuf
1,创建 go 项目
查看 go 版本:
> go version
go version go1.19 linux/amd64
创建一个 go 项目:
> mkdir hello-protobuf
> cd ./hello-protobuf
> go mod init github.com/hello-protobuf	# 使用 Go Module 管理项目,生成 go.mod 文件
下载 protoc-gen-go:
> go get github.com/golang/protobuf/protoc-gen-go
如果无法下载,则可以更换代理地址:
go env -w GOPROXY=https://goproxy.cn
安装 protoc-gen-go:
> go install github.com/golang/protobuf/protoc-gen-go
最后,将 protoc-gen-go 放在系统目录中:
> cp protoc-gen-go /usr/local/go/bin/
注意:protoc-gen-go 在
$GOPATH/bin目录中
2,创建 .proto 文件
例如我们现在要传输用户信息,包括 name 和 age 两个字段。
创建 user.proto 文件如下:
syntax = "proto3";

// 这是一行注释

option go_package="./helloworld";

package helloworld;

message User {
	string name = 1;
	int32 age = 2;
}
其中:
- syntax:声明 protobuf 的版本,如果不声明,则默认是 proto2。
- 要与 protoc 编译器的版本一致。
- option go_package:定义生成的
.pb.go文件的路径,一般跟 package 包名一致。 - package:包名。
- message:定义消息结构。
- 一个 proto 文件中可定义 1 个或多个 message
- 注释:以
//开头。 - 标识号:在消息定义中,每个字段都有一个唯一的标识号。
- 标识号是 [0, 2^29 - 1] 范围内的整数
- 示例中的 1 和 2 就是标识号
- 结尾符号:要以分号
;结尾。
3,生成 .pd.go 文件
执行如下命令,生成 .pd.go 文件:
> protoc --go_out=. user.proto
--go_out用于指定输出目录,它会加载 protoc-gen-go 程序。
4,序列化与反序列化
创建 main.go 文件:
package main

import (
	"fmt"
	"github.com/golang/protobuf/proto"
	"github.com/hello-protobuf/helloworld"
)

func main() {
	user := &helloworld.User{
		Name: "lucy",
		Age:  18,
	}

	// 序列化
	s_user, err := proto.Marshal(user)
	if err != nil {
		panic(err)
	}

	// 反序列化
	newUser := &helloworld.User{}
	err = proto.Unmarshal(s_user, newUser)
	if err != nil {
		panic(err)
	}

	fmt.Println(newUser)
}
执行 go 程序:
> go run main.go
——————————————————————
name:"lucy"  age:18
来看下现在的目录结构:
> tree hello-protobuf/
————————————————————————
hello-protobuf/
├── go.mod
├── go.sum
├── helloworld
│   └── user.pb.go
├── main.go
└── user.proto
5,optional 与 repeated 修饰词
例如下面定义:
message User {
	string name = 1;
	int32 age = 2;
	optional string password = 3;
	repeated string addres = 4;
}
生成的 protobuf 结构如下:
type User struct {
	Name     string   `protobuf:"bytes,1,opt,name=name,proto3" json:"name,omitempty"`
	Age      int32    `protobuf:"varint,2,opt,name=age,proto3" json:"age,omitempty"`
	Password *string  `protobuf:"bytes,3,opt,name=password,proto3,oneof" json:"password,omitempty"`
	Addres   []string `protobuf:"bytes,4,rep,name=addres,proto3" json:"addres,omitempty"`
}
- optional:表示是一个可选字段
- 对于发送方,在发送消息时,可以有选择性的设置或者不设置该字段的值
- 对于接收方,如果能够识别可选字段就进行相应的处理,如果无法识别,则忽略该字段,消息中的其它字段正常处理
- repeated:表示可以包含 0~N 个元素,可看作是数组
6,oneof 修饰词
oneof 表示只设置多个字段中的一个字段。
示例:
message User {
    oneof sex {
        string man = 1;
        string woman = 2;
    }
}
编译后生成的类型如下:
type User struct {
	// Types that are assignable to Sex:
	//
	//	*User_Man
	//	*User_Woman
	Sex isUser_Sex `protobuf_oneof:"sex"`
}
7,enum 与 map 类型
枚举类型,用于限定传入的字段值必须是预定义中的值。
enum 类型:
enum Sex {
    man = 0;	// 必须从 0 开始
    woman = 1;
}

message User {
    Sex sex = 1;
}
map 类型:
message Hello {
	map<string, string> names = 1;
}
8,嵌套类型
message 可以嵌套,称为嵌套类型,嵌套类型可以定义比较复杂的结构体。
嵌套有两种模式:
- 内部嵌套
- 外部嵌套(推荐使用)
内部嵌套示例:
message Hello {
	// World 在 Hello 内部
	message World {
		string name = 1;
	}

	World world = 1;
}
- 外部若想使用内部的 World,语法为
Hello.World
外部嵌套示例:
// World 在 Hello 外部
message World {
	string name = 1;
}

message Hello {
	World world = 1;
}
9,service 定义服务
要想将消息类型用在 RPC 这种,需要使用 service 关键字来定义 RPC 接口。
示例:
// The greeter service definition.
service Greeter {
  // Sends a greeting
  rpc SayHello (HelloRequest) returns (HelloReply) {}
}

// The request message containing the user's name.
message HelloRequest {
  string name = 1;
}

// The response message containing the greetings
message HelloReply {
  string message = 1;
}
- service 用于定义 RPC 服务
- Greeter 为 RPC 服务的名称
- rpc 是修饰方法的关键字
- SayHello 是 RPC 方法名称
- HelloRequest 是入参类型
- HelloReply 是返回值类型
6,gRPC 示例
这里的 gRPC Golang 版示例来自官网:
下载示例代码:
> git clone -b v1.49.0 --depth 1 https://github.com/grpc/grpc-go.git
> cd grpc-go/examples/helloworld
下文中对官方示例做了一些简化。
1,创建一个 go 项目
> mkdir hello-grpc
> cd ./hello-grpc
> go mod init github.com/hello-grpc	# 使用 Go Module 管理项目,生成 go.mod 文件
2,helloworld.proto 文件
syntax = "proto3";

option go_package = "./helloworld";

package helloworld;

service Greeter {
  rpc SayHello (HelloRequest) returns (HelloReply) {}
}

message HelloRequest {
  string name = 1;
}

message HelloReply {
  string message = 1;
}
编译 proto 文件:
> protoc --go_out=plugins=grpc:. helloworld.proto
看下当前的目录结构:
> tree hello-grpc
————————————————————————————
hello-grpc
├── go.mod
├── go.sum
├── helloworld
│   └── helloworld.pb.go
└── helloworld.proto
3,grpc_server.go 文件
package main

import (
    "context"
    "log"
    "net"

    pb "github.com/hello-grpc/helloworld"
    "google.golang.org/grpc"
)

// 定义一个类型
type GreeterServerImp struct {
}

// 实现 GreeterServer 接口中的 SayHello 方法
func (s *GreeterServerImp) SayHello(ctx context.Context, in *pb.HelloRequest) (*pb.HelloReply, error) {
    log.Printf("GreeterServerImp Received: %v", in.GetName())
    return &pb.HelloReply{Message: "Hello " + in.GetName()}, nil
}

func main() {

    s := grpc.NewServer()
    pb.RegisterGreeterServer(s, &GreeterServerImp{})

    lis, err := net.Listen("tcp", ":8888")
    if err != nil {
        log.Fatalf("failed to listen: %v", err)
    }

    log.Printf("server listening at %v", lis.Addr())

    if err := s.Serve(lis); err != nil {
        log.Fatalf("failed to serve: %v", err)
    }
}
4,grpc_client.go 文件
package main

import (
    "context"
    "log"
    "time"

    pb "github.com/hello-grpc/helloworld"
    "google.golang.org/grpc"
    "google.golang.org/grpc/credentials/insecure"
)

func main() {

    conn, err := grpc.Dial("localhost:8888", grpc.WithTransportCredentials(insecure.NewCredentials()))
    if err != nil {
        log.Fatalf("did not connect: %v", err)
    }
    defer conn.Close()

    c := pb.NewGreeterClient(conn)

    ctx, cancel := context.WithTimeout(context.Background(), time.Second)
    defer cancel()

    r, err := c.SayHello(ctx, &pb.HelloRequest{Name: "world"})
    if err != nil {
        log.Fatalf("could not greet: %v", err)
    }

    log.Printf("Greeting: %s", r.GetMessage())
}
5,运行程序
运行服务端程序:
> go run grcp_server.go
运行客户端程序:
> go run grcp_client.go
—————————————————————————————————————————
2022/10/07 17:42:03 Greeting: Hello world
(本节完。)
文章作者 @码农加油站
上次更改 2022-05-20